Sometimes knitting is more fun when it's not a mystery to be solved. This post is for all the knitters seduced by the Mermaid Gloves who are wishing for a simple loops-through-loops fiber experience.
I've jotted down the details of how I made the Mermaid Gloves, and will be presenting the info in several parts. My mission is not to create a stand-alone pattern, but to eliminate the mysteries that I had to work through along the way. If you're going to print your reference material and wander away from the computer, make sure you print the Pomatomus Socks pattern. I will try to incorporate enough of Steph's clues from the Craftoholic site so that you don't need to carry those pages as well, (although those pictures really do offer a high "drool" factor).
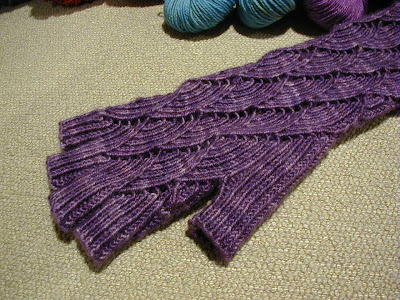
My biggest mystery was the gusset. These instructions will walk you through the gusset design that I came up with, (shown in the pictures here and previous). It doesn't match the one that Steph used, but I'm thrilled with it and hope you will be too!

********************
Part 1 - The Right Glove from Cast On to the Base of the Fingers
My supplies:
Blue Moon Fiber Arts, Socks That Rock Medium weight yarn in Tanzanite
One set of KnitPicks #0 circular needles, 32", (I used the Magic Loop technique)
Print out of the Pomatomus Sock pattern
Gage: The charted stitch pattern measures 1 inch wide by 2 1/8 inch tall for my gloves. They're knitted to be a little tight for me in order to get a cozy fit around my hand.
Start out following the Pomatomus sock pattern; Ribbed cuff, then six horizontal pattern repeats around, stacked three high. Keep an eye out for the stitch that migrates between needles after each row 22, otherwise you'll be wondering why things don't line up on the next row 1.
As in Steph's notes, the gusset is made in the fourth vertical pattern group. I built my gusset in the fourth horizontal pattern repeat, first on the second needle. (That positions the slight unevenness associated with the cast-on knot on the underside of the arm.) Here's the complicated part… In that pattern block omit all of the "tog" stitches, instead knitting the two stitches that would have been tog'd to match the previous row's stitches. K tbl the Ktbl'd stitches and purl the purled stitches.
Work this way throughout that whole pattern block, (through row 22), with one other minor change. On row 13 add a stitch, (M1), located such that it precedes 11 K tbl ribs waiting on the left needle. I suggest adding this stitch after the normal purl between the ribs just because it seems easier than adding it before. Purl this extra stitch in every following row so that there are two purl stitches next to each other and then 11 K tbl ribs. This gives definition to the fish scale on the top of the hand.
After finishing row 22, put the extra 23 stitches on a holder starting with the double purl. Join the remaining stitches back into a round on the next row 1. Knit one more pattern repeat with all six pattern blocks normal per the chart.
Knit one row of 1 x 1 K tlb purl rib all the way around.
Now you're ready for fingers and thumb. But that's enough for me for now!
*************************************
This picture's actually the left glove but I mirrored it to make it a clear reference:
Pretty easy, huh? Wish coming up with that gusset was as easy as knitting it! The design inspiration came after figuring out from the Craftoholic pictures and other gusset approaches that I wanted to increase 22 stitches over 22 rows. Normally these would be increased one each before and after the gusset on every other row. I figured I'd ditch the togs and see what happened knowing that I'd end up with the same count of extra stitches. I was thrilled, although I did rip back to add that M1 on row 13.
I'll report the details of how I did the fingers and thumb soon. The thumb still took an additional trick to give it the look I wanted. As for the fingers, I'm sure what I did was not the best approach, but it worked out fine in the end.
Currently I'm slogging through the left glove. It's been a significant and surprising bundle of challenges. There will be more on that too once I've blurted out all my secrets from the right glove.
Happy Knitting!


4 comments:
Thank you so much for sharing your idea for the gusset. I've been stuck at wrist-level for awhile now and have ripped out too many gussets to count. Thanks for the ideas to take another shot!
when you say the stitch that migrates, what do you mean? because I think that this is the reason things don't line up in the next pattern repeat...
But how, oh how, do you do the gusset for the left glove? its pretty late so perhaps I am just being dumb....instructions please?
I've really appreciated all of your hints, tips, and instructions so far....I've finished the right glove up to the fingers and am about to start the gusset on the left glove.
You rock!
XO
Cool story as for me. It would be great to read a bit more about that matter. Thanks for sharing this info.
Joan Stepsen
Latest gadget
Post a Comment